Salamanders: Fire and Fury

The most recent commission undertaken was a Salamanders Redemptor. This model is one of the newer ones in the Adeptus Astartes range and man, it is one of the coolest to paint and also get a dynamic pose.

Designed to be, arguably, the replacement for the Dreadnought from the power armour Space Marine range. This Primaris Dreadnought towers over the original, white metal one. That piece was released way, way back,circa 1990 has since had many a plastic upgrade to make it a little more substantial, but there is nothing really like this new beast of a walker.

The model was preassembled on receipt and just took a little cleaning up; this is pretty much the state that I received it: ready to go!

20200510_014417_2

Some initial sculpting to really make this model unique for a Salamander force.

While that was curing, I started construction of the base. I had to cut the feet away, since it was receivedĀ  glued to the base. Along with custom base sculpting, I usedĀ  some Agrellan Earth to get the smaller crackle on the base and Vallejo Ground Texture and finally Mod Podge to seal it all together.

Work with the airbrush soon began and I layed down undercoat, base and preshading with the magnificent tool; it really helps to get the essentials down and ready to go so that you can soon work on the really fun stuff.


More areas showing the transitions, now with the addition of the brass (starting to block out where I want it to be brass).


Edge highlighting and finishing the brass:

Freehand work. Battle damage, flame icon on chest and Salamanders Chapter symbol:

Completed Redemptor Dreadnought based and painted:

There you have it; I had a lot of fun working on this project. If you have any questions about the process involved, please post in the comments; I am welcome to any questions you may have.

Next piece to add to the Salamander collection is going to be two very different pieces. An Invictor Tactical Warsuit and a 2nd edition 40k Space Marine Rhino.

Killteam

Over the past year and a half or so, I have really been enjoying Killteam 40k . The game was announced way, way back in March of 2018 and subsequently released in the summer of that year. I have been enjoying the game so much that I even decided to launch my very own podcast for the game.

Just a side note; I will be discussing Killteam 40k the skirmish game and Warhammer 40,000 the large scale game interchangeably in this blog post. To make it quicker and easier to refer to each game, Kill Team 40k will just be Kill team and Warhammer 40,000 will be referred to as 40k.

The box set is jam-packed with a lot of really great content, but aside from two fantastic kill team squads, the most awesome aspect of the models in the set, is the beautiful terrain that you get.

This inspired me to get the airbrush out and paint up a tables’ worth of terrain. You can really get into a lot of detail for the game board, since an important part of game play tactics, is to utilise small pieces of terrain as cover and receive a benefit of making it harder for your opponent to shoot you (it reduces the the Ballistic Skill of the shooter). I know many 40k players have purchased the set for simply the terrain and sold off the remaining rules and minis. I picked up a few different kits and combined them to make some truly awe inspiring buildings.


Leading up to the release, I discussed with my main gaming friend about what factions we might pick up upon release. The box set contained both Genestealer Cult and Adeptus Mechanicus. Immediately the idea to work on a faction that was not in our existing gaming repertoire and so I picked the Ad Mech. On purchase of the box and reviewing the rules I really liked the ruleset of The Thousand Sons. They have the ability to be really tough, their standard bolters have an AP of 2 and their main heavy weapon, The Soulreaper cannon is a Heavy 4, str 5, AP 3 gun. From my point of view, it is one of the best weapons in the game. I was hooked and from the first week of release, I left the Ad Mech in the dust and focused on making my Thousand Sons MY faction. One of the strong game mechanics for the Thousand Sons was their psychic presence. They were one of only two factions in the Kill team game that access to psychic powers from the core rule book, so that meant one of only two factions that could take advantage of a whole phase in the game while many could only just sit by and take the hits, oh and their psychic ability is actually pretty great.

The Thousand Sons, mostly done.. well, enough to game with:

I looked at a few types of terrain colour schemes out there and after looking at one of Duncans’ painting tutorials I was sold. There were a couple of schemes that when used together from various painting tutorials, that gave it a nice blend of cool and uniqueness.

The main colour scheme for the wallsĀ  and metal work I took from this video:

Painting Sector Imperialis (video remains the property of Games Workshop)

The flooring was a particular challenge to get it the way I wanted. There just wasn’t anything that I liked until I saw this video…

Painting Sector Imperialis Flooring (video remains the property of Games Workshop)

To be honest it is a really hard find. When randomly looking for painting scenery for Kill Team, it doesnt come up for me in you tube playlists very often and once I spent a really long time trying to find it again (for some unknown reason). After much frustration I found it and decided to save it to a Kill team playlist on You Tube, that way I will have it in the spot where I need it.

There are times where I’ll paint just one part of a mini and although I may like it, I don’t always get a sense of the overall feel for the colour composition and that is exactly how I felt about this paint scheme. It wasn’t until I did the whole floor of the building, that sold me on the colours. I did put a bit of blind faith in Duncan’s eye and it turned out fantastic. The painting method did bring back an old love of mixing up a whole pot of a colour I knew I would use frequently. GW used to sell empty hexagonal mixing pots and it was so, so useful, definitely a luxury.


20200508_002954_2

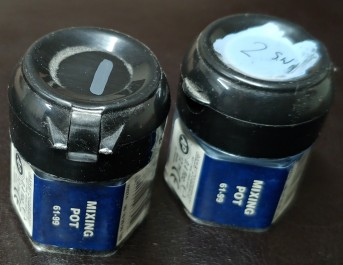
Premixed colours for my Space Wolves

20200508_003012_2

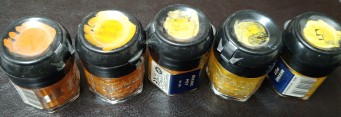
Premix for my Iyanden Wraithlord

Back in the day there were many pots of colours I would just have lying around for a whole component of an army, once it was a very dark grey that I was using for my Space Wolves and another time it was the three colours of orange/ brown that I had for my Iyanden. I would have placed a bit of the paint colour on the top of the lid and once dried up, would write a little number to signify where it was in my process for painting the models. Those pots have now since dried up and am actually in the process of dumping them, also they are now, non existent and I used to buy them by the bucketloads; they were amazingly useful.


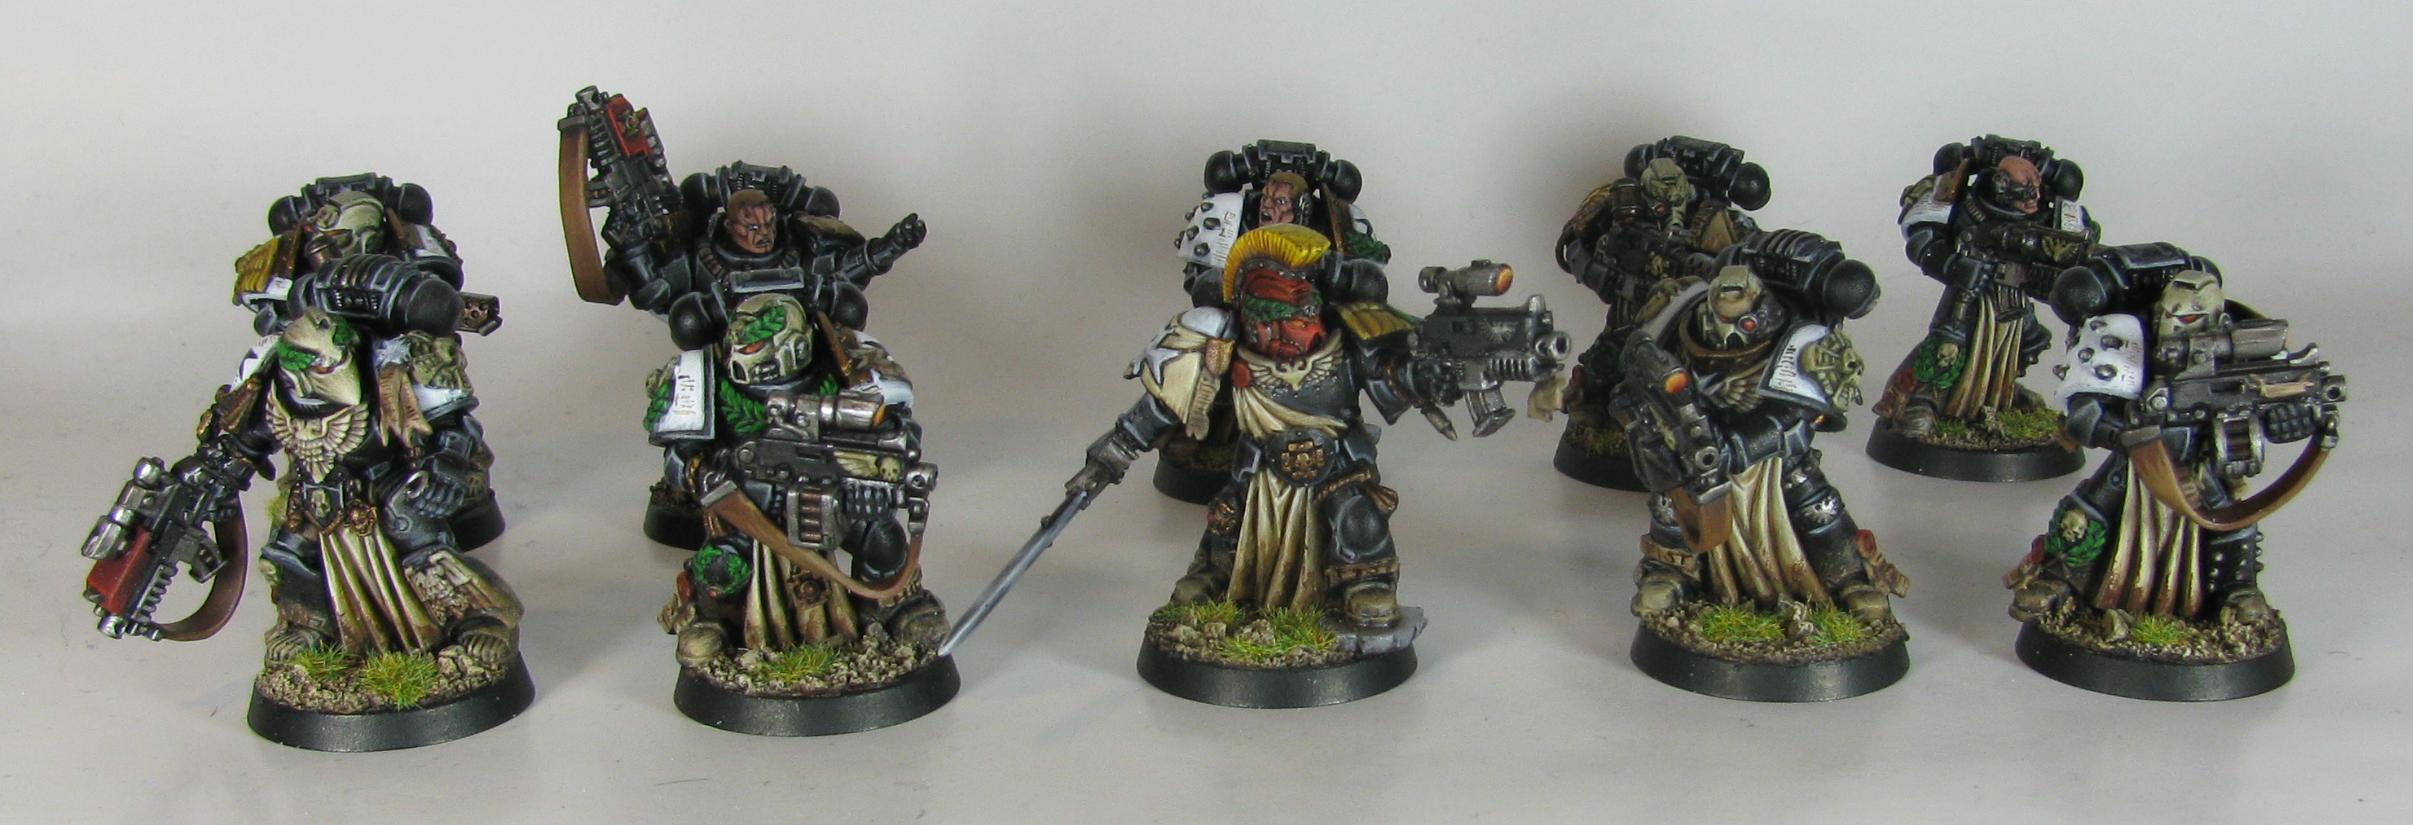
After a while of painting up the scenery and Thousand Sons I decided to try another army and since I was working on Deathwatch for 40k, I was in the Ordos Xenos mood, so I decided to build a Deathwatch Kill Team. That way I can also add them to my 40k army. I know it goes against my self imposed rule of working on factions of which I have no existing 40k list. Since the Deathwatch debacle of 2018 (blog post forthcoming… stay tuned), I wanted to redo some of the unit composition and so I thought to myself, I will add work on some Kill Team for Deathwatch and just plug them into the main 40k list.

As you can see here I have some work in progress minis and I wanted to take advantage of the tactics/ specialists from the core rule book for them, but couple that with the cool sculpts from the GW range of Primaris Marines to convey a real WYSIWYG (What You See Is What You Get).

Some of the Deathwatch Killteam as they are being worked on:


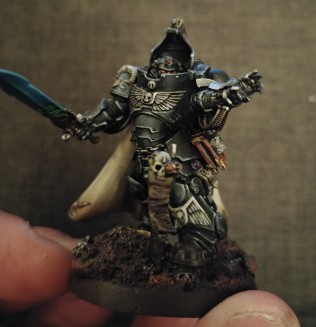
THE DEATHWATCH PRIMARIS LIBRARIAN

20200507_210933_Burst01_2 (1)

Along with the sweet Deathwatch Veterans, I also wanted to use the cool new Librarian model and combined it with components of the Dark Imperium Primaris Captain model to really give me a fantastic looking mini to lead the Kill Team.

There were two components that I found in my bits box, that I had to use and they just sell the model so well. One was a book from Mordheim and the other was just the perfect scale even though it was technically from a different game and that was a small Inquisitor “I” that was fromĀ the Deathwatch liking model Artemis, of Inquisitor a 54 mm scale game from 2001.


CONVERTING THE PRIMARIS LIBRARIAN

Screenshot_20200507-221558_2

This conversion turned out to be one of my favourite recent projects. To be honest, I’m not a fan of the amount of robes on this Epistolary Librarian; it’s just too overboard for my tastes.


20190227_004319

I used the helmeted head for this character, since it lends itself more to the Deathwatch Librarian, cut the psychic hood off, and filed it down to fit onto the area behind the head of the new Librarian.


For the body, legs and backpack I used the pieces from the captain model from the 8th Edition box set; Dark Imperium, which coincidentally has a really awesome cloak, befitting for a trooper of that status. Along with those components, I added from the existing Librarian model; the sword, arm and librarian shoulder pad, and finally the outstretched hand/ arm (casting the killing blow probably in the form of a well placed Smite). The Deathwatch shoulder padĀ  and the aforementioned Mordheim book and Inquisition “I” from from my bits box.

20200507_210957_2Once based I decided that it needed just a little “something else” and that little something was one of the servo skulls that I trimmed off from one of the Frag Cannon models for my Deathwatch army in 40k. It even had a little mini “I” on the skull forehead; PERFECT!

So all in all I think that the mini turned out pretty awesome, a great model to run alongside a Watch Sergeant. A definite centrepiece for the Kill Team. Let me know what you think of the conversion and what you have done for your special characters.


Ahh, it’s so good to be back!

I certainly has been a long time since I have posted anything here in the Seismic Miniatures Blog; god knows I have still been painting like a madman. This post comes at a time in the world where we are experiencing the crazy Corona Virus and since we have all been keeping away from other people, I thought it would be no better time than to get this blog back up and running.

This is just going to be a little refresher post, my main one for this weeks entry is regarding a commission I just wrapped up (its just a little one that I thought would help me refresh my light box use). Over the past few years, I have been painting lots of different minis, from Star Wars Legion, to some boardgame minis and yes, of course many 40k models. Over the next little while,I intend to get some pics of the new stuff I have been playing around with and give some honest feedback on products that I like to use in my painting arsenal.

I am just coming through the final few minis for my Adepticon 2020 list and you will see them very soon, but I thought I would just discuss the next stage of the Seismic Studio. For the past few years I have had a pretty sizeable table to paint on, but it was a situation where I made use of a workbench and setup the studio there. As a consequence, it tended to be unconfortable to paint at and my painting area didn’t have a way that allowed me to arrange all my paints in a way that would allow me toĀ  get at the colours I needed in a pinch. Due to upcoming house renovations I am relocating my painting area and properly designing a painting area.

I looked at a few painting tables out there on social media and I found a really wicked system that utilises magnets to keep the components in line. The company is called HobbyZone from out of Poland and they seem to be the premiere system for reorganizing everything on your hobby desk. One really great feature (and I think the most important), is that for the most part, the components are a consistent 30 cm wide by 15 cm deep/ high and this really helps you to rearrange the different sections to your liking and needs. They have a huge variety of drawers and paint holders that desigining a painting table was a little daunting.

Photos will come soon but as I am just starting out with a couple of kits, I feel it would be a little bit of a lacklustre review. Once I get some moreĀ  photos taken of the before and after, I will be happy to do an indepth review.

In the meantime, please go and check out photos of a fresh commission I am just wrapping up for a client. You will find it over at the Work In Progress page.

In the meantime, it is so great to be back with new content, stay tuned and see more of what I have been doing of late.


Weapons EVERYWHERE!

The current Deathwing commission has now taken me onto a FW Dreadnought. The client has asked me to paint the dreadnought up, but with magnetizing the arms for weapon refits. As I am new to magnetizing weapons for units/ models, I will hopefully be able to post some of the progress here for you all to see. It should be a lot of fun.

Dread weapons

As you can see here, the array of weapon options here is just simply staggering. I would love to really see just how each of the different combos are against various enemies in a game of 40k.

I just have a final right arm to add also, it being a close combat weapon. Next step will be the washing of the resin, since FW use a release agent on all their castings, then onto a coat of paint..

I will be joined by a painting buddy on what we deem to be known as Dreadnought Wednesay. He intends to purchasing a new dreadnought and painting it up with me.

Product Review: Games and Gears Ichiban synthetic brushes

I had the very lucky opportunity to attend GenCon this past July and there were some particular reasons for wanting to attend. Aside from partaking in some FFG tournaments, I wanted to find some new products for the painting studio. Leading up to the event I knew that there were going to be some smaller miniature/games companies and I also knew that there were going to be some painting hardware that I wanted to lay my hands on.

I had seen numerous Facebook posts about Games and Gears brush sets and unsure about preordering a set, I ultimately decided to simply walk up to the booth at the ‘con.

With a solid plan, I scoured the vendor hall and found booth #718 that had the brushes on sale. There were two sets that I spied and picked up, The GenCon exclusive Collectors series (of which a review will come soon as it contains the very special brush named the Xtreme Kitana) and The Ichiban Synthetic brush set, of which this review is based around.

I really liked the feel of the brush in my hand, weight-wise at the ‘con. It seemed to beĀ balanced very well and the construction of the handle, being made of what looksĀ to be a type of aluminium, lends itself to being weightedĀ well. The Ichiban set came as a set of three, in a Ā leather pouch, so I decided to pick up a set, along with the GenCon exclusive set.

I got these brushes home to Canada and started to use them in a current commission that I had to put on hold whist I attended what is touted as being “The best four days in gaming” (trademarked by GenCon). With no hesitation, I decided to use the size #3 for work on a Landraider Crusader hull for a Deathwing army. This brush was able to give me great coverage over the larger panels, with minimal stress to the brush. As I got further along, I needed to employ the size #2 to the main bone work of the hull for the crusader. This brush quickly took a hit to the tip. I have found that with many brushes, the make or break of the brush, for me is just how the tip holds up to my painting. I know many painters dislike Games Workshop brushes for the quality, but if a brush can’t keep it’s tip, then that caused me more hassle than I need. I then moved onto the finest brush of the set, the #1. The size of this equates to something inbetween a Standard Games workshop brush and their Basecoat brush, so it was perfect for getting some finer details on the hull panels for the Crusader. This brush has really kept it’s point while I edged all of the panels of the Crusader. I am really happy with this brush.

All in all I am somewhat, to pleasantly pleased with the overall set of brushes. I really wish the brush sized #2 kept its tip, as that is the one I really wanted to have do the majority of the Landraider Crusader armour, but this is something I am finding with synthetic brushes, so maybe I am working them too hard? I had barely been using the brush for 12-20 hours of work and found a poor result here.

PROS:

  • The brushes are weighted extremely well, so my hands don’t get tired, or cramp up when painting for long periods of time. This is one of the main selling points for me as I tend to do some super long painting sessions
  • The way in which the handle switches back to provide a cover for the brushes, is a great idea, especially if I should transport them to painting classes.
  • They come in a great case to protect them.
  • The size #3 gives really good, smooth coverage, with a great paint yield. Perfect for doing medium, to large panels for vehicles.
  • The size #1 holds a point well, and this is really good for highlighting larger panels. This size, once again, gave me great paint yield, before I had to re-dip onto my palette for some fresh paint.

CONS:

  • Size #2 lost it’s fine tip much faster than I expected, but I did put it to work very hard once I started.

Overall I am pleased with the set, and if I could purchase the size #1 individually, I would, since it is a really great in between size for me, and one that would see a lot of application for me. If Games and Gears were to allow an individual purchase of the brushes, I would be all over that. If this was the case, then the brushes would score a solid 8/10, but seeing as I must purchase them as a set, I would rate them a 7/10 as I cannot afford to have one brush die so fast, with the other ones left laying around.

Gen Con 2015- I made it there AND back.

So I have returned from a awesome time in Indianapolis for my very first GenCon. Among playing lots of games, and playing in a few tournaments, I spend my Sunday connecting with a ton of game and miniatures companies. It was fantastic to chat with those who are in the industry and there were quite a few miniature companies just starting off.

I haveĀ brought back a ton ofĀ minis to paint up and get them looking good for the blog. Hopefully those of you who follow this blog may see something that you like and mention the new stuff to any friends who may collect them. The goal hereĀ is to paint up some really different pieces and to build up my repertoire to show my range and skills.

Keep your eyes peeled for some new stuff that is in the works!

The trials and tribulations of assembly

The studio has undertaken a commission to paint up three of the Lieutenants from Descent, Journeys In The Dark. This is a questing game or a”dungeon crawling” game that I have yet to play, but looks very similar to a game that I used to play in the ’90s called Warhammer Quest.

I had some downtime last evening, where I thought it would be great to simply clean up the models ready for the start date of the commission for the client, which isn’t for a while yet. The models I received were three Lieutenants: Belthir, Bol’Goreth, and lastly Valyndra, the Wyrm Queen.

Valyndra is the model that I want to specifically talk about today.

I find the cleaning up of models, really satisfying, but it can beĀ tedious. There is nothing more unsightly than a model that has has a lot of time being painted with mould lines showing. I really felt that as I was developing my abilities as a painter many years ago, even if I couldnt get an ‘Eavy Metal studio paint job on my models, if I could clean the miniature up well, then it helped the aesthetics of the model immensely. I really like to go to town and clean as much off as I can and well sometimes you just can get all, without damaging the model, but I really attempt to have the light shine on the model, to help with finding as much of the mould lines as I can.

After cracking open the blister packaging that the model comes in, I took stock of what I hadĀ in front of me:

With this being my very first Descent experience, I immediately found that the model was sculpted in a very beautiful manner. I could tell that there was a major difference in the time required to assemble a Descent model, compared to that of Games Workshop (you could easily spend hours assembling a few models from GW, but that is half the fun). Now dont get me wrong, I understand that the miniatures serve two different markets of gamers. Wargaers who play Warhammer Fantasy or 40k, are modellers and painters as well as gamers and as such command a different level of interaction with the assembly of their models. They like to be able to have multiple parts, so that they can easily convert up models so that one, say, High Elf Lord on a Dragon is different from somebody elses. Whereas gamers who play games with miniatures such as Descent, or Relic, or even Mansions of Madness are primarily board gamers and as such they are a demographic that just want to open the box, setup the game and go for it.

I found that there was a really fine mould line on Valyndra, so immediately I got out my set of files and hobby knife and began to clean up the plastic. The plastic was just shearing off from the edge of the model, making it a really effortless task. I did notice one significantĀ quality to the plastic, of which I will get into in a moment. The mould line, being such a fine line here, was at times a little hard to detect. That actually is a good thing because someone who doesn’t want to do any prep work whatsoever (and for Descent, most don’t) can be assured that they have a high quality miniature that is professionally made. It was clear on certain parts of the body, that because the Wyrm has had the major assembly done prior to packaging, there were slight gaps or minor misalignments evident, but nothing that I couldn’t fix.

Now, as I was filing away I noticed that the plastic was an extremely soft, bendy plastic that I suppose lends itself well to board games miniatures. Its better that if a miniature is dropped, that it bend under the fall. I have noticed that all Fantasy Flight minis for their board games use this particular type of plastic. The main thing I was concerned with is just exactly what type of glue to use here. The two main glues that I have are super glue and polystyrene cement. Super glue is used for any metal miniatures and polystyrene cement is a glue that is used for plastics where you apply a small amount to each of the sides to be stuck together and wait a few seconds. What actually happens here is that it melts the plastic a little and then when you press the two pieces together, the pieces “melt” together and eventually set, resulting in something that is glued together.

I did a little research and found that the material used in production is actually a vinyl plastic,Ā thereforeĀ super glue won’t do the trick. Poly cement won’t be as effective as if I were to be gluing GW plastics, so I had to investigate another product. It was something that I actually had already and was calledĀ The Last Glue and it is composed of something called Cyanoacrylate. It bonds when the two sides are deprived of oxygen, so if I were to get any on my fingers, everythingĀ would be ok, until I touch the two together (which I think is a normal reaction) and it is strong, really strong. I had recently run out, so an order was placed and should arrive in perfect time to glue together Valyndra.

I think my point here is I really like the plastic that FFG use for their miniature products in the preparation, now I just need to get the mini stuck together and painted. There will be many photos of the painting process, so keep on checking back in the future.

Hobby Beginnings (part 2)

Well, I had decided on undertaking The Aurora Chapter as my army. The colour was nice, the rules were simple for a newbie, that is I didn’t have to go and get Codex Space Wolves or Angels of Death.

I then headed out to expand my abilities for the army, in the form of Dark Milennium. This add on was a box that had all sorts of cool wargear cards and as I was taking a dreaded Librarian, my opponent was done. He had planned on using the Orks and there was no way to stop me with my new, cool wargear. I also had another secret weapon; an Eversor Assassin, which would absolutely decimate my opponent’s Orks.

Little did I know he actually had been scheming to build a brand new army, one that I didn’t know much about and that were the TYRANIDS! Well that begun the famous war between The Aurora Chapter and Tyranids. Over time as the armies developed and new editions were released, both of us have “evolved” our lists to combat each other better and better. The Aurora have started taking much more bolter weaponry, both in the form of heavy bolters, and storm bolters. I started toying with a Whirlwind, and a Land raider Crusader. Now I even though I havent played against Steve in a long time (I moved overseas) I have now taken a Thunderfire Cannon, simply since my mindset is heavy firepower in the form of making my opponent take armour save, after armour save and whittle him down with the saves he fails. A sheer amount of firepower is the key.

Now The Aurora Chapter’s third company is almost completely painted. The most recent tidbit of information about the Chapter had mentioned that they take a large contingency of Predators,(news to me) there should be some more rolling out from the Manufatorums on Mars, also I just have to paint up one or two more tactical squads and also, with a Thunderhawk slowly, and i mean slowly being done, an Apocalypse game is in the works, we will just see when we can get that organised.

It is really interesting to see just how the Tyranids have evolved with the latest edition being a shootier game and it’s all about scoring units, time will tell.

The return of Templars and yes we’re back in the studio!

Hi there folks. I has been a crazy month or so. Vacation has been taken and the studio has been inundated with lots of requests for commissions. Keep your eyes on the blog for lots of models from different games, such as Descent, Malifaux and even some Fortune and Glory. All these commissions will give the studio an opportunity to expand the miniature repertoire and this is very exciting

One commission that has just been finished are a unit of Black Templar Sternguard. These models are an absolute joy to assemble and paint. The sheer number of options are just so exciting. The potential here for conversion is just so palpable and any bits left over will most definitely find their way into many other conversions.

So as they say; without further ado, here is the latest unit to come of the Seismic Studio painting table; a unit of 10 Black Templar Sternguard…

Sternguard Full Unit 2

These models from the beginning, were a joy to assemble, and paint. At times were a little overwhelming with just the sheer number of options available on the sprue. There are many, many bits left over to use for a squad or two. It seems like finally GW are really listening to their customer base. This is something I want to explore in another post, for the time being back to the Sternguard.

When I was painting the models some things came to mind that I wanted to showcase.

With the unit being of such an elite status, I really wanted to show them being veterans with their helmets looking really different from that of crusader squads The tactical squad equivalent in a Space Marine army. I felt that when you look at them next to each other on the battlefield, there should be a vast distinction between the regular squads and the veterans.

Another way was to paint the black armour in a slightly different way. I wanted to keep it as similar to the crusader squad that I had previously painted for my client, but during the process I made a fatal error, one that basically erased my work on the armour up to that point. I wanted to make it as rich in colour as possible, so what did I do? i gave the armour a black glaze. This wiped out hours of my painting time and brought the black armour to a point at which I couldn’t really discern what I had done. What did I do I hear you ask? I started to blend on the armour. Now this would be a really silly idea if I was painting a regular unit and it would be even sillier if I didn’t have my saving grace; my wet pallet. This allowed me to keep my paints nice and moist, while I worked my colours on the models. In the end I am really happy with the outcome.

The last way that I was able to have them stand out was through no accomplishment of my own. They have all been given beautifully sculpted robes, that are just perfect for Templars and they all have ornate boltguns and shoulder pads. By painting the Crux Terminatus and the robes in their own distinct style, I could keep the pallet for the unit to be black, white and bone. This is especially effective in tying them to the remainder of the army, yet keeping them looking like they had been through years of campagns.

At the end of the day, I am super happy with the result of the models and will be ready to paint up my own unit of Sternguard for The Aurora Chapter very soon…

The Angels of Death

Here we see a recently completed commission for a client wanting six heavy weapons for his Blood Angel tactical squads.

Image

This was a particularly enjoyable commission in that it was super easy to achieve a stunning result in no time at all.

The scary thing is now I will just have to paint up my own unit for my army.